What Is the WordPress Memory Limit?
WordPress memory limits are sometimes referred to as WordPress PHP memory limits or simply PHP memory limits. It mostly determines how much memory a script may utilize on the page.
Servers house all of a website’s data and files. Thus, in order to keep the site functioning, a server must have sufficient storage space, CPUs, and RAM or memory.
A server’s RAM capacity varies based on the hosting provider and package utilized. In comparison to a corporate or professional plan, a beginner plan often provides less RAM.
Each web application and function consumes memory. The more plugins you install or media assets you upload, the more RAM your site will use. If it runs out of memory, the site’s loading speed may slow down, or it may not load at all.
As a result, the WordPress memory restriction exists to guarantee that the website scripts do not exceed the RAM capacity of the server.
The best way to increase WordPress’s memory limit
The memory limit is just 32 MB by default, which might not be sufficient for your website. There are, however, a number of ways to make it bigger.
The cPanel PHP Configuration, editing the .htaccess or wp-config.php file, or upgrading your hosting package are all options.
FTP
Using an FTP client like FileZilla is one method of editing the .htaccess or wp-config.php file. Before continuing with one of the following lessons, make sure that FileZilla is linked to the FTP account for your website:
Editing the .htaccess file
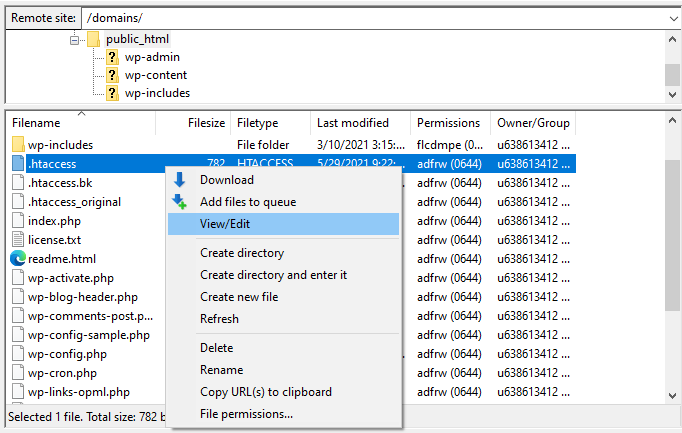
1. Locate the.htaccess file in the site’s public_html or root directory.
2. To open the text editor, right-click the file and select View/Edit.
3. Look for the following phrase:
# END WordPressAdd the code below it:
php_value memory_limit 256M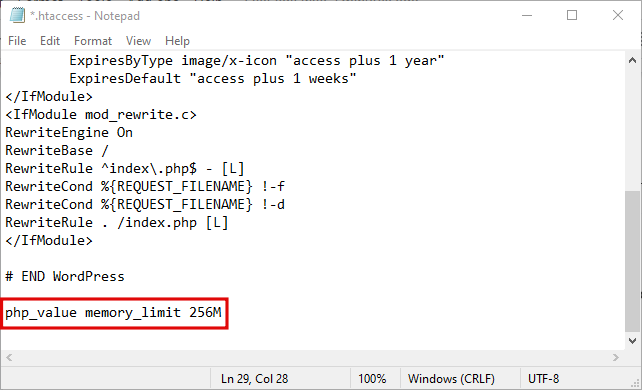
4. Close the editor and save the file.
5. When FileZilla prompts you to upload the changed file, choose Yes, and then reload the page.
Changing the wp-config.php file
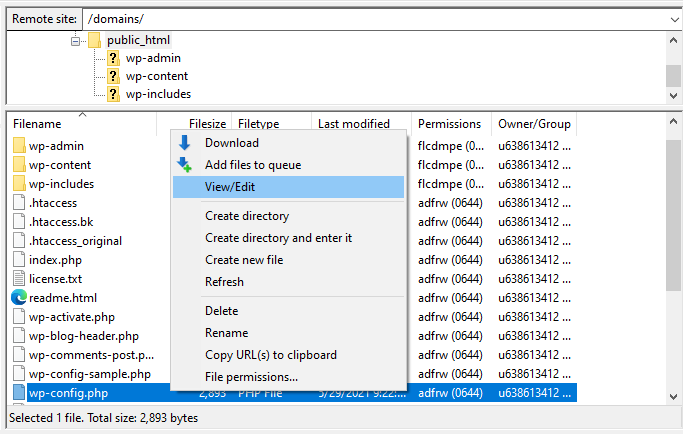
1. Right-click the wp-config.php file in the root folder and choose View/Edit.
2. Change the value of WP_MEMORY_LIMIT from 64M to 256M.
3. If it does not already exist, add the following code above the line /* That’s it, stop modifying! Happy publishing! / or / That’s it, no more editing! */: Have fun blogging.
define('WP_MEMORY_LIMIT', '2048M');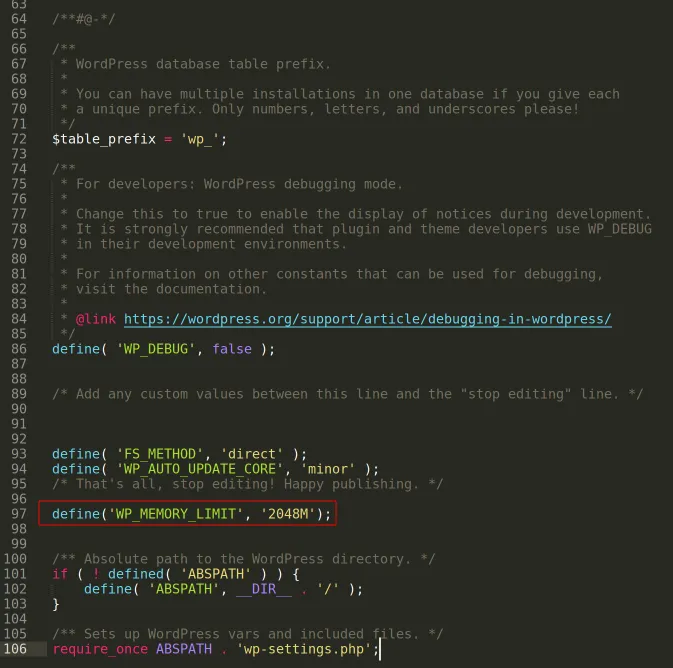
4. Save the modifications and upload the file.
You should no longer get the “memory limit exhausted” warning while viewing the site.

Thanks for your marvelous posting! I genuinely enjoyed reading it,
you might be a great author.I will be sure to bookmark your blog
and will eventually come back later on. I want to encourage
you continue your great posts, have a nice day!
Great web site. Plenty of helpful info here. I’m sending it to
some buddies ans additionally sharing in delicious. And of course, thank you to your sweat!
My web page :: creator platform