

Lazy Loading
Let’s quickly go over what lazy-loading is since it will help you understand how the code we’ll present here works and how to simply implement it.
Lazy loading is the process of only loading something when it is needed. In the case of pictures, this implies that the images are only loaded when the image components are visible.
Part One – The Script
The first component of the equation is a short JavaScript snippet that can be added to any website. Here is an example of the code:
<script> document.addEventListener("DOMContentLoaded", function() { var lazyBackgrounds = [].slice.call(document.querySelectorAll(".lazy-bg")); if ("IntersectionObserver" in window && "IntersectionObserverEntry" in window && "intersectionRatio" in window.IntersectionObserverEntry.prototype) { let lazyBackgroundObserver = new IntersectionObserver(function(entries, observer) { entries.forEach(function(entry) { if (entry.isIntersecting) { entry.target.classList.add("bg-visible"); lazyBackgroundObserver.unobserve(entry.target); } }); }); lazyBackgrounds.forEach(function(lazyBackground) { lazyBackgroundObserver.observe(lazyBackground); }); } }); </script>The primary idea behind this code is as follows:
- All elements with the class .lazy-bg are stored in an array.
- All components with the class .lazy-bg are stored in an array.
- When any of the items in that array come into view, an IntersectionObserver is called.
- When the element reaches the viewpor
Part One – The Script
Once the script is up and running, we can begin populating our components with background pictures. I would encourage you not to perform any of this until the page is completely developed. This should be the final step before publishing the page or site.
Step 1 – Add the Lazy Loading Class
lazy-bg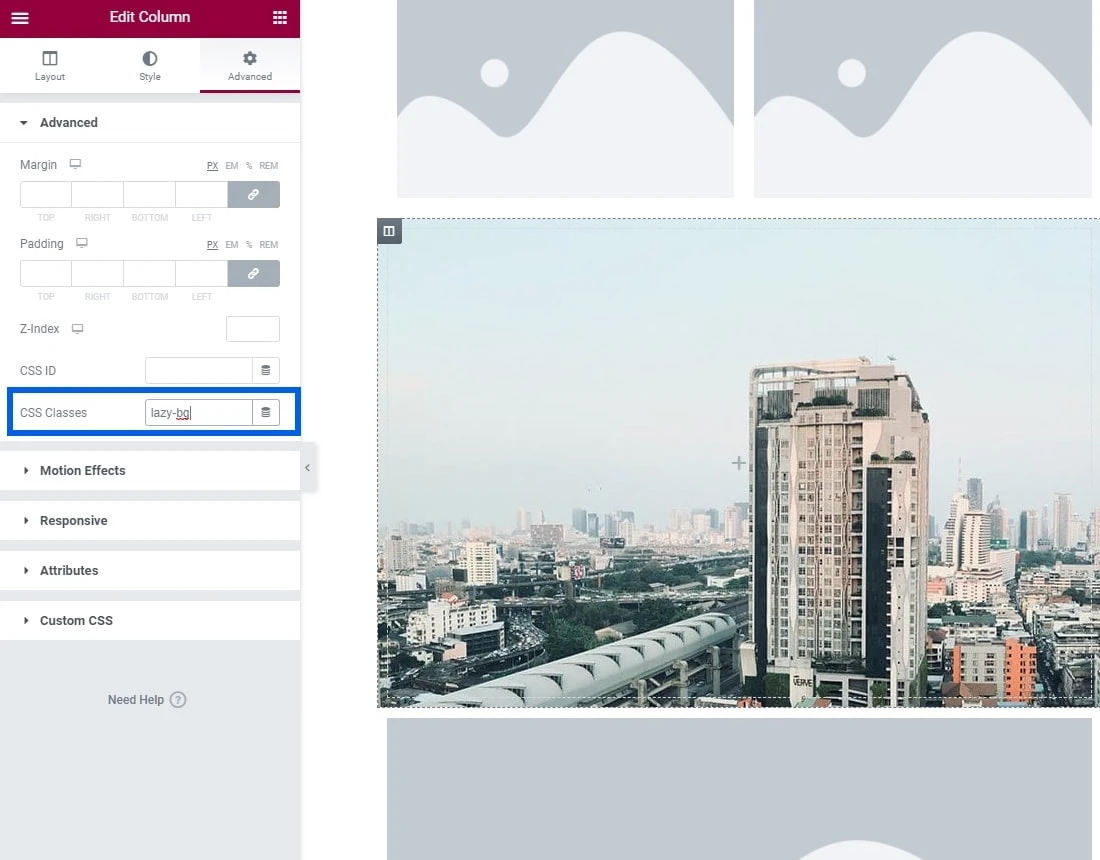
Step 2 – Set the Background Image Using the BG-Visible Class
After you’ve added the class, you’ll need to shift the background image from the element to the class. Using the same examples as before, here’s what that might look like:
selector.bg-visible{ background-image:url('/my-lazy-bg-image.jpg'); }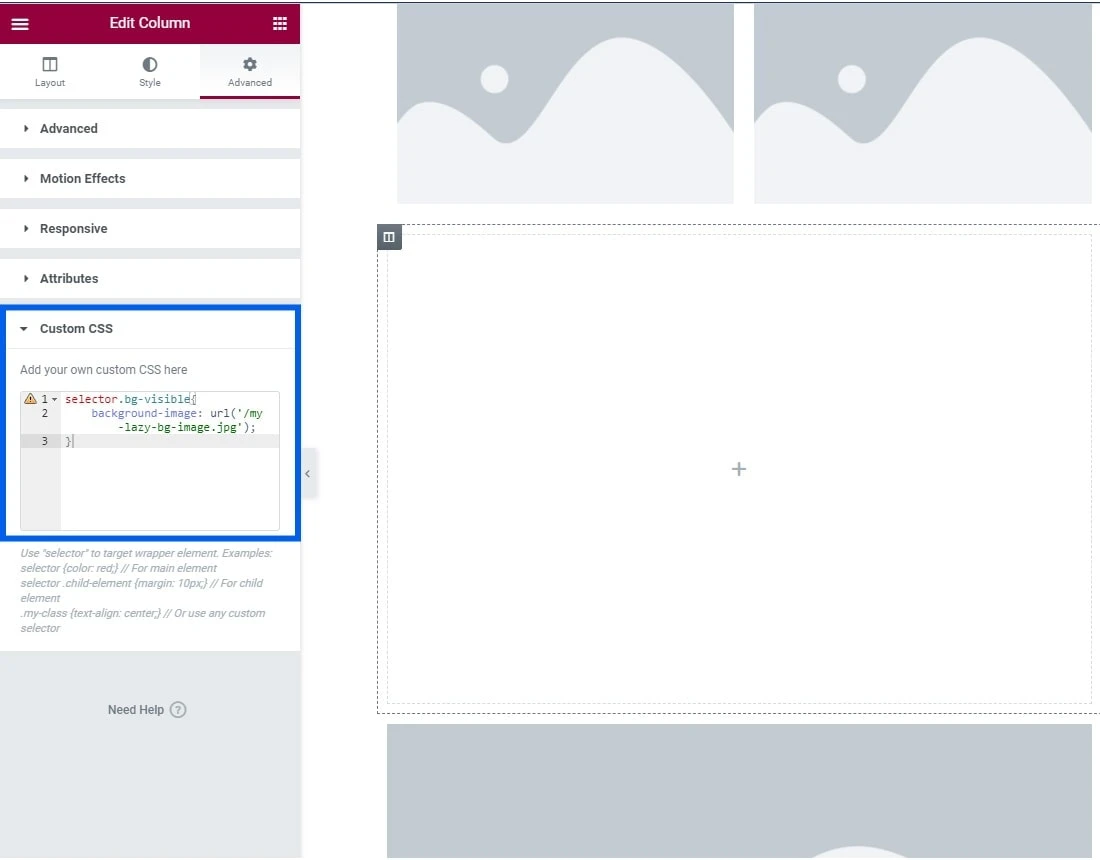
There are various ways to apply CSS to either Elementor. It doesn’t really matter how or where you add it; what matters is that the CSS is present someplace. In the preceding instances, we included the CSS in Elementor’s Custom CSS for the specified element.
Conclusion
So that’s all there is to it! With a few minutes of work, you’d have reduced your page “weight”, or size, quite a bit. Most background images are in the 80KB – 180KB range, with some being larger in size depending on the amount of detail and the quality of the image.
Consider a page with 3 background images, that’s a savings of between 210KB – 540KB in page size. That’s a half a megabyte!
This is one little secret that can shave off a solid amount of time off your page load times, and help you get one step closer to optimizing the following Core Web Vitals:
- First Contentful Paint
- Largest Contentful Paint
- Speed Index
- Time to Interactive
